
Occasionally I publish gaming content on my personal gaming account perlox5Â and today just happened to be one of those days. My friends and I have played quite a few hours of Civ 5 but it’s always here and there weeks or months apart. And like every RTS you don’t play regularly it can be hard to get back into it right away because you have to “relearn” everything. Well I decided to hop into Civ 5 today and create a quick tutorial with all the important reminders for playing the game. This is also a good resource for new players who just got it from the Steam sale (or however) and want to improve their skills. Hopefully this will be enough for you to crush some city states and mercilessly rule over the great lands of Civilization V!
Tag: beginners guide
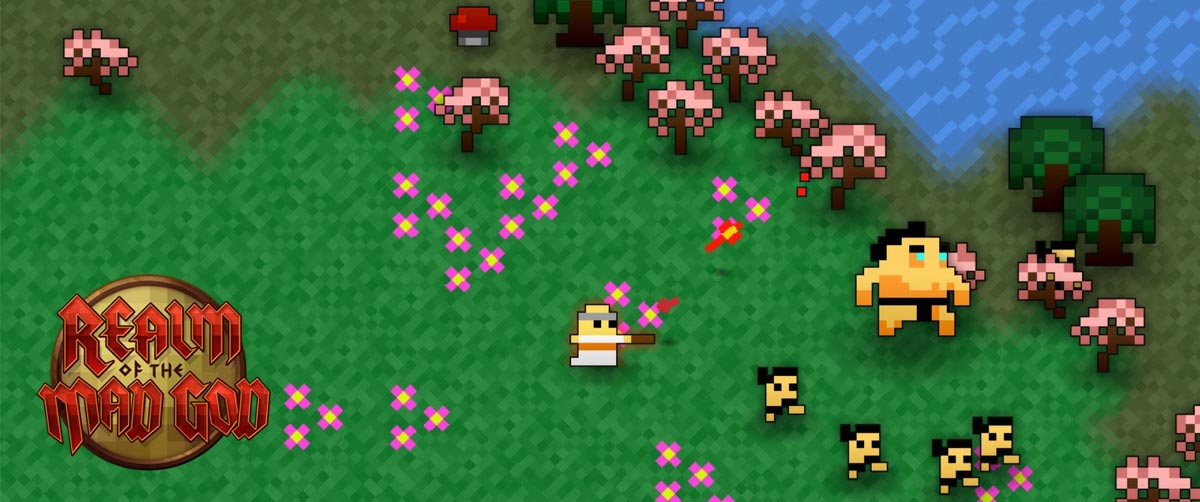
Realm of the Mad God gameplay analysis and quick start tips
My friends and I were looking for a new game to play this weekend, something quick and easy to install and get into. We discovered Realm of the Mad God on Steam. It was a pretty fun way to waste a few hours and I decided to create a quick start tutorial to help new players get into the game and understand what is going on. Especially since, the first time I jumped in, I got pulled into the end-game right away and died immediately. I had no idea what had happened. Hopefully this will explain some of the basics to get you off the ground.
How to surf in Counter-Strike: Global Offensive
Over at my personal gaming channel perlox5, I published a CS:GO surfing tutorial that covers exactly what you think it would: surfing! It’s an addicting little mini-game that’s been with the Counter-Strike series for years and it’s a great way to waste hours of your life, jamming to Liquicity and smoothly gliding along the creative, and sometimes frustrating, worlds of surf. I highly recommend giving it a try.
In this particular video, I’m playing on surf_air_arena_v4, a very forgiving map that doesn’t put you in jail when you fall off the map. It also has boosters in various places to get you up to speed and plenty of ramps to land on. It also isn’t a “start-to-finish” design, so you can literally just fly around like crazy without finishing it. It’s a great map to practice on. You can download the map for yourself here, but remember to change your server variables to:
- sv_airaccelerate 150 or sv_airaccelerate 999
- sv_staminajumpcost 0
- sv_staminalandcost 0
Have fun and be sure to subscribe!
Team Fortress 2 Class Strategy – Soldier
Soldiers are a simple and moderately effective class that best fits new players and those offering defensive or offensive backup. I recommend new players using the soldier because it will give them a chance to explore the maps while offering the most help to the rest of the team.
The soldier’s main weapon is a 4 round rocket launcher that can serve two effective measures. First is to simply add to the barrage of fire from other classes in either an offensive or defensive maneuver or to rocket jump. Rocket jumping is the act of jumping and firing a rocket at your feet. This propels your character to normally unattainable heights and can be used to gain the advantage over the other team. The secondary weapon is a standard shotgun that many other classes possess. It deals moderate damage and can be useful when targets get too close. The shovel serves as the soldier’s melee weapon and is comparable to most other melee weapons.
Soldier health and speed also come into play when determining class selection. The soldier’s health is much higher than most but they sacrifice a lot of speed making them a deadly choice for snipers and spies. I would recommend sticking close to the pack to help deal out the DPS in offensive strikes. I would also like to note that while soldiers can hit fairly hard the low round capacity can severely hinder their performance on the field. Soldiers should also note that while they can take a beating, turrets are still deadly and can’t be faced head on (but you’re in luck because soldiers usually have enough time to flee the LOS).
So where do Soldiers belong in team strategies? Pretty much anywhere! Soldiers can be very helpful both defending and attacking and have some crowd controlling abilities when using the splash damage from rockets. They also can be useful for pinning down enemy sniper positions, aiding in the destruction of turrets and other engineer buildings and pushing back uber charges.
I recommend having a soldier per 5-7 players.
Tip 1: While soldiers seem like an obvious class to uber, doing so is rather ineffective. Medics should avoid ubering soldiers unless absolutely necessary due to the fact soldiers can only carry 4 rounds at a time.
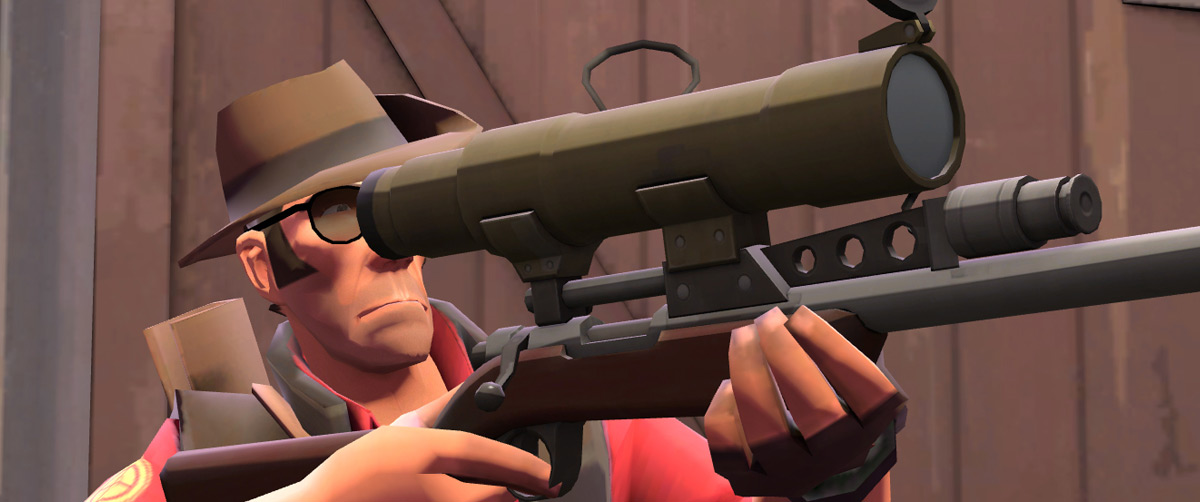
Team Fortress 2 Class Strategy – Sniper
The sniper is a fairly simple class to pick up but to master requires quick reflexes, knowledge of the map and good timing. Any veteran sniper knows that it’s not about how many people you hit, but who you hit.
The snipers main weapon is the sniper rifle (obviously) which deals moderate to high damage depending on how long it charges. The charge shows when you scope in and ranges from 0-100%. At 100 percent it will deal the highest amount of damage and will kill just about anyone in a single head shot. Even when not fully charged a head shot automatically has a 100% chance to crit and will most likely kill a weaker target. The snipers secondary weapon is a fully automatic “machine pistol†that deals low damage for close encounters. This leaves the machete which deals comparable damage to most other melee weapons.
While snipers are excellent tools on the field they are also very vulnerable. Turrets, heavies, demos, soldiers and pyros can easily tear down snipers if they get too close while even scouts, spies and medics will do their fair share of damage. Good snipers will need to be vigilant when targeting their enemies and must focus on whom they attack first. The first target all snipers should focus on is other snipers. This is done by picking them out and strafing back and forth, while zoomed, to get the headshot. After the target is taken out you have a choice. If there are enemies rushing your position they come first. If not, I would recommend taking out slow moving enemies like heavies and soldiers who can hit you from a distance. Medics can be another great class to take out but are fairly difficult to keep targeted. Of course any enemy that is stationary should be killed immediately regardless of class.
Tip 1: If you are sniping and can see an enemy turret being built take a shot at 100% power. If the turret is new it will destroy it. You can also take out teleporters and dispensers if engineers aren’t constantly repairing them.
Tip 2: Snipers should always keep their backs against a wall or something solid if possible. This act deters spies and other classes from getting behind them while scoped in. A good sniper also knows to check his surroundings almost constantly.
Tip 3: When using your Sniper Rifle, the laser dot that is used for aiming is also visible to the enemy. If you can hide it for example by pointing it to the side of a doorway and then quickly moving it into position when someone runs through, it will leave the enemy unaware.
Team Fortress 2 Class Strategy – Demo
The demo is an absolutely devastating class when played well and should be considered a regular for any competitive team. They excel both in offensive strikes and defensive stakeouts and will find themselves topping most other classes. For the average player the demo will feel a little odd when first played but the sacrifice of learning them has a huge payout.
The demo’s weapons consist of two grenade launchers and a glass bottle. The first launcher holds 4 grenades that bounce of walls and is the primary tool for offensive attacks. During a defensive position this launcher should be used as a side arm to the second grenade launcher which fires sticky rounds. These sticky grenades are the demo’s ultimate weapon. They can be concealed if placed correctly and can instantly kill any enemy if more than 4 are placed. This weapon takes the most skill to master but in turn offers the most reward. The final weapon, a glass bottle, renders itself as a melee weapon and does average damage to an opponent.
Notes about the demo’s weapons: Both grenade launchers do splash damage however the first launcher is much less effective unless it takes a direct hit.
Demo health is fairly high and can withstand a short barrage of bullets before dying. Turrets should never be faced directly like any other class but demos tend to have more of a window to take fire and flee than say, a scout or medic. Heavies can also cause demos trouble and require at least 3-4 stickies to kill. Scouts, while being weak and vulnerable to the high rate of splash damage from stickies, can be a huge annoyance to demos who have little defense once someone crosses the sticky barricade. Be sure to couple your defenses with a soldier or close range combatant to help ward of scouts and breached enemies. The final class to be aware of is snipers who will target demos who plant their stickies from a stationary position.
Demo strategy is fairly simple but requires patience, timing and knowledge of the maps. Their primary objective as discussed above is defensive planting with the sticky grenade launcher. Areas like door ways, capture points, and rail cars are all great places to defend but even the corner of a hallway and a ceiling can be useful. Know where your enemies are and which ways they can come and be ready to detonate. The secondary objective demos face is offensive strikes. The best strategy for demos is to get the high ground and launch stickies into well traversed areas. If this isn’t possible, stick with the pack and use the normal grenades as backup fire until you can get into position. Remember it’s never wise to get impatient and run ahead of the group into a defenseless position. The final and sometimes most important objective a demo will have is engineer clearing. This is when a fully charged medic ubers a demo to rush turrets, dispensers and teleporters. All demos should know that by choosing this class they must be ready to take down engi-groupings whenever necessary. To successfully pull this off there are a couple rules to follow. First is don’t panic when you get ubered. Relax, make sure you’re loaded and rush out. Rule two is: ignore random enemies. It is not worth the seconds of uber time killing them as it is to wipe out turrets. The third rule is to plant stickies intelligently. If you have 8 fully loaded rounds, make sure 4 land at each turret. If you can take out two turrets your job is done, just flick to the normal grenades and die fighting or run like hell. If there is only one turret, plant 4 at the base and the rest around that area. Many players will congregate at dispensers and teleporters and it’s almost guaranteed those are near the turret. Launch your 8 and detonate (sorry for the rhyme).
I recommend 1 demo per 5 players unless there is an excess of engineers on the other team, in which more are probably needed.
Tip 1: As a demo, you should pretty much always have 8 stickies laid down somewhere or another. When entering unfamiliar territory, such as an enemy base, set some down at the entrance before advancing. This way if you encounter enemies, you have a point to fall back to. This helps to offset the fact that demos are not particularly good at close range or against moving targets such as scouts.
Tip 2: Uber Stalling – Demos can use their stickies not only to kill and defend but also to stop prevailing uber charges. By launching a couple rounds and detonating in quick succession you can juggle or blow back enemies away from your team mates and engineer buildings.
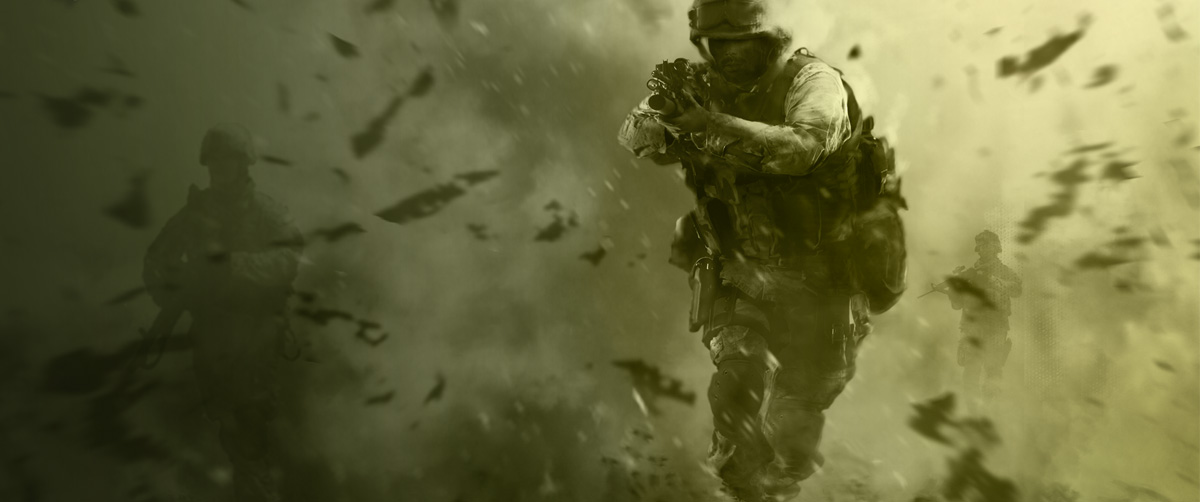
Call of Duty 4 Strategy Guide (v.2)
Welcome to Call of Duty 4 multiplayer. The growing popularity of online gaming has reached a new level of excitement as competitive gaming exceeds traditional barriers and offers more and more unique experiences. CoD4 is no different and because it has so many elements, it sometimes needs a detailed breakdown of the weapons, levels and perks. This is p3rl0x’s guide to the world of Call of Duty 4.
I am going to start with the weapons, then the weapon attachments and finally work through all the perks. After I’ve got the create-a-class section completed, we’ll move onto level break down and how to successfully become a better Call of Duty player.
Assault Weapons
The first category of weapons is the assault variants. Here is the list of different weapons, a little information about each and my opinion of their usefulness on the field.
M16A4 – This is a standard issue assault rifle that fires a 3-round burst and fires accurately at both short and long range. It’s unlocked right from the beginning and is a great tool if used correctly. Some players have noted a strong disliking for the M16, but fired true, it is very deadly. I recommend using the silencer or ACOG scope attachment. (DMG: 40 – 30; ROF: .065; 925 rounds per minute; RANGE: 1500-2000 / 750-1500 [Silenced])
AK-47 – The AK-47 is one of my least used assault rifles. While it fires a high powered round and can be fairly effective at short/medium range, the gun is very inaccurate at a distance. The recoil bounces the gun around more than desirable and fails to keep up with the other assault rifle counterparts. I recommend using the red dot sight or silencer with this weapon. (DMG: 40 – 30; ROF: .085; 700 rounds per minute; RANGE: 1500-2000 / 750-1500 [Silenced])
M4 Carbine – The M4 is one of the most versatile guns in the game. It offers both short and long range usability, fully automatic fire and is packed with a decent punch. If there is one gun in the game you should be using, it’s this one. I recommend the silencer with this gun. (DMG: 30 – 20; ROF: .07; ~850 rounds per minute; RANGE: 1500-2000 / 750-1500 [Silenced])
G3 – The G3 is of a different breed. It is a semi-automatic rifle that is extremely accurate at long range and can be an amazing tool once mastered. I highly recommend trying it out both with a silencer and ACOG scope. (DMG: 40 – 30; ROF: .05; RANGE: 1500-2000 / 750-1500 [Silenced])
G36C – Fully-automatic fire and a decent clip don’t make up for the failures of the G36. It is inaccurate and falls behind all the other assault weapons. Don’t waste your time on this gun! I recommend using the red dot sight or silencer. (DMG: 30 – 20; ROF: .08; 750 rounds per minute; RANGE: 1500-2000 / 750-1500 [Silenced])
M14 – The M14 is a semi-automatic rifle that fires a powerful round, accurately at long range. For those interested in trying a field between snipers and assault rifles, here is your gun. I recommend using the silencer or ACOG scope. (DMG: 50 – 40; ROF: .05; RANGE: 1500-2000 / 750-1500 [Silenced])
MP44 – This World War II veteran is brought to life in CoD4 and offers a relatively unique experience. I don’t often use this gun for serious games, but it can be fun to mess around with. It is fully automatic but fires much more slowly than other guns. Take a little time to play with it, but I don’t recommend it as a serious choice. (DMG: 40 – 30; ROF: .1; 600 rounds per minute; RANGE: 1500-2000 / 750-1500 [Silenced])
Sub-Machine Guns (SMGs)
The second category we’re going to look at is the sub-machine gun section. These guns are compact, agile, and when used correctly, very deadly.
MP5 – A favorite weapon for SWAT and small arms teams, the MP5 makes its appearance as a brutal sidekick. It has a decent rate of fire, is very accurate compared to the other SMG’s and is a great choice for urban settings. I recommend using the silencer or red dot attachments. (DMG: 40 – 30; 800RPM; RANGE: 750-1000 / 350-700 [Silenced])
Skorpion – This little beast is less accurate than the MP5 but offers a quick burst of fire. It can be a great ally in close quarter combat. I recommend using the silencer or red dot sight. (DMG: 50 – 20; 850RPM; RANGE: 200-400 / 100-300 [Silenced])
Mini-Uzi – The Mini-Uzi is somewhat of a hybrid between the MP5 and Skorpion in that it has a fast rate of fire and can be relatively accurate. However, because the recoil is worse than either of them, controlling this SMG can be somewhat of a chore. I recommend using the silencer or red dot sight. (DMG: 30 – 20; 950RPM; RANGE: 750-1000 / 350-700 [Silenced])
AK-74u – This compact assault rifle can be a decent tool when choosing from the SMG section. It is fairly accurate and fires a powerful round, but the bouncy recoil makes it hard to control. I recommend using the silencer or red dot sight. (DMG: 40 – 20; 800RPM; RANGE: 750-1000 / 350-700 [Silenced])
P90 – The P90 is easily the most effective SMG of the lot. Its fast, it’s accurate and even when sprayed from the hip it maintains a small scatter. It is often called a noob weapon because any new player can pick it up and spray to kill. I agree in this statement, having seen it many times, but regardless, this weapon is very effective and I urge you to test it out. I recommend the silencer or red dot sight. (DMG: 30 – 20; 925RPM; RANGE: 750-1000 / 350-700 [Silenced])
Light-Machine Guns (LMGs)
The third section which is made up of Light Machine Guns or LMG’s, is a support position that offers weapons with high rates of fire, huge clips of ammo and little accuracy. These guns are most effective in large groups and offering suppressive fire.
M249 S.A.W. – Like I stated above, this weapon has high potential for clearing rooms full of enemies. Its high rate of fire and 300-round capacity makes it a real monster on the battlefield. I recommend using the Sleight of Hand perk to decrease loading times because it leaves you very vulnerable to enemy attack. I also recommend using the grip for this weapon to reduce recoil. (DMG: 30 – 30; ROF: .065; 925 rounds per minute; RANGE: Unchanged damage at all distances)
RPD – The RPD, like the SAW, has a high rate of fire and the same power behind the blow. The key differences fall in the reduced recoil and smaller clip of the RPD. Depending on your play style, you make see more benefits in either. I recommend using the grip for this weapon. (DMG: 40 – 40; ROF: .085; 700 rounds; RANGE: Unchanged damage at all distances)
M60E4 – The M60 is the most unique of the LMG’s. It is generally a vehicle mounted weapon and thus offers a huge punch and is effective at long range. However, this weapon suffers from much more recoil than the other two and needs to be fired in bursts to garner the most accuracy. It also is very heavy, has a slow reload time and the iron sights can obscure a lot of your view. If you are going to use this weapon, I recommend the grip, red dot sight or ACOG scope. (DMG: 50 – 40; ROF: .01; 600 rounds; RANGE: 1000-1500)
Shotguns
Normally I would cover the shotgun section, but because of their ineffectiveness in hardcore game battles it seems rather pointless. Rifles in CoD4 offer both short and long range combat that easily substitutes themselves over shotguns.
Snipers
The final weapon section is my personal favorite: Snipers. These high powered, single shot kill weapons, are fierce allies or enemies on the battlefield. You will love and hate them, but regardless of your views, it is a section you spend some time becoming comfortable with.
Note: All sniper rifles do 70 – 70 damage and have virtually the same sway and accuracy. The Dragunov has more kick than the rest, while the R700 has much more sway. The ranges on all are very similar, but may be different.
M40A3 – This is what I like to call the training rifle. It is bolt-action which means it has a slow reload but it offers a huge range of fire and a deadly accurate shot. I recommend starting with this rifle so you can learn how to get those perfect shots which will help you with snipers like the M21.
M21 – The M21 is an urban sniper rifle and is much more practical because of its semi-automatic capabilities. This weapon has limited recoil and thus can pump off many shots fairly accurately. It is one of my weapons of choice and I highly recommend giving it a try.
Dragunov SVD – This sniper rifle has a powerful kick to it, but seeing that all the snipers do virtually the same damage it doesn’t make a lot of sense to use it. You may find that the scope is a nice and big, giving you a clear view, but you can really only get one shot off before return fire. Give this weapon a try, but you may find the M21 or M40 to be a closer friend.
R700 – This is my least favorite sniper. It feels and acts almost exactly like the M40, but it’s sway is ridiculous. I tried it out for awhile because I thought it did more damage than the other rifles, but found myself cursing the day I chose to add it to create-a-class. I would just avoid this sniper.
Barrett .50cal – While most of us were probably really excited for this rifle, I am saddened to report that it doesn’t perform as successfully as I hoped. I have spent some time testing this rifle out and I found it less impressive than I wanted. It also has some decent recoil and a small scope. I would still test it out, but don’t get your hopes up.
Pistols and Sidearms
Before we move on to weapon attachments, there is one section we still need to discuss: pistols or side arms. This section won’t be broken up because the pistols are all very similar to each other. The M9 and USP are virtually the same gun, except for clip size (the M9 has a larger clip). The M1911 has a smaller clip but slightly more damage. The only remarkable difference between the pistols is between these three and the Desert Eagle, which hits harder at the cost of a small clip. I recommend any of them.
Weapon Attachments
Let’s now move on from weapon categories to weapon attachments. This section will discuss the benefits and disadvantages of each attachment and my personal use of each.
Grenade Launcher – This little weapon, which is often referred to as the “noob tube,†“noob stick,†or “noob launcher,†is actually very effective. It requires little skill when simply launched in the direction of you enemies but you should keep in mind this attachment replaces perk 1. I recommend this if you can deal with the shame of using it.
Most Effective On: M4 Carbine, G36C, AK-47, M14, G3, or M16.
Silencer – The tool of choice when it comes to stealthy engagement. I use the silencer on all my weapons because it maximizes my stealth capabilities and covers my muzzle flash. I also like the fact that I can get off shots without alerting enemy team mates of my position. I highly recommend using this attachment.
Most Effective On: All weapons applicable.
Red Dot Sight – The red dot is a very simple add-on that aids you in viewing down your rifle. Use it if you have trouble with the Iron Sights or on a weapon that can sacrifice not having a silencer.
Most Effective On: SMG’s, LMG’s, and M4.
Grip – The grip can only be used on LMG’s and Shotguns and should be taken advantage of. It reduces recoil which can be very useful on those weapons.
Most Effective On: LMG’s and Shotguns.
ACOG Scope – Some people really hate this scope, and some really love it. I am one that love’s it. When I first started I thought it obscured too much view and moved around too much. However, after spending some time with it attached to my M16, I found it very adaptable to long range combat. I would recommend trying it out on a rifle that can fire accurately, but would not replace silencer with it.
Most Effective On: M16, G3, M14 and any sniper.
Perks
Now the section that really matters! Perks are perhaps the most interesting and most influential part of the game. They offer tons of options and really bring your individual flair to the battlefield. Be very careful what you pick and make sure it correlates well with the gun you are using (I’ll try and help you out).
Perk Category 1
Bomb Squad – This perk is often overlooked and I myself haven’t spent a lot of time with it. Basically it helps you pick out enemy explosive devices like C4 and claymores. It might be great if you are worried about dying in games like Search and Destroy but I don’t think it has much practical application elsewhere. Give it a try, but don’t expect to use it often.
Most Effective On: Close combat load-outs (long range, slow moving classes can avoid this perk).
C4 Explosives x2 – C4 is personal preference. I’ve seen it used well for traps and thrown in enemy dugouts to get kills, but it requires more thought than the rest of the perks in category 1. If you have a team of 4 or 5 people it may be a good idea for one person to use C4 and set defensive traps.
Most Effective On: Any class can take advantage of C4.
Claymores x2 – Claymores are excellent. They are basically a necessity for snipers, and anyone else who likes to play slow and stealthy. Just place in a hidden location and you have something watching your back. They are also great even if they don’t get the kill because now you know where the enemy players may be. If you haven’t used them yet, apply them to your sniper load-out as soon as possible. Also remember that they blow in the direction the lasers are facing and don’t forget that the enemy can see them if they aren’t place correctly!
Most Effective On: Snipers and long range assault classes.
RPG-7 x2 – The RPG is a ground-to-air missile that is designed primarily for shooting down enemy choppers. However, the RPG can also be used to blow up cars and other destructible equipment on the battlefield. I don’t really recommend using it to attack ground targets because it is pretty inaccurate, but if you can hit somebody, it’s pretty sweet.
Most Effective On: Combat classes (LMG and assault load-outs).
Special Grenade and Frag x3 – Both of these perks are straightforward, either receive more frags or special grenades at spawn.
Most Effective On: Everyone, however it is urged that snipers and long range assault classes pick up claymores.
Bandolier – This perk gives you increased ammo capacity. It can be a great for those out there that tend to spray and pray or for snipers that live long enough to run out of ammo. I don’t use it very often because usually there are guns on the ground to pick up, but it’s definitely worth trying out.
Most Effective On: SMG classes or snipers.
Perk Category 2
Juggernaut – This perk is great for non-hardcore rounds, but seeing as this guide is targeted for the opposite, I would not recommend it. Why? Because usually enemies get a chance to knock off a few rounds before you can move. Juggernaut gives you 75% more of your normal health and considering that hardcore starts you at 30 health and most guns do twice that, it just isn’t enough to counter the damage.
Most Effective On: Close combat classes.
Sleight of Hand – This is a very useful perk for LMG’s and shotguns, but really can be used for anything. All it does is decrease the time for you to reload your gun. The faster the reload the less time you’re out of the battle which is always important.
Most Effective On: SMG and LMG classes.
Stopping Power – I’m not really sure what I think about this perk yet. The description says “increased damage†which is always nice, but in hardcore our health is already so low that most guns only need one shot. I would test this out and see if it really makes a difference. If it’s noticeable be sure to post it in the BoS forums so I can add to this article.
Most Effective On: Any class except snipers, who already dish out more than enough damage.
UAV Jammer – I wish I could add some sound of cymbals crashing. This is easily the most useful perk in the game. I use it on all my weapons almost regardless of what it is. The jammer provides instant stealth protection and a huge advantage over the competition. If there was one thing in CoD4 that I would recommend using, it is this perk. No matter what gun, no matter what other perks you use, this one is immaculately important. If you are a sniper, rely on stealth, or are using any silenced weapon for your effectiveness this must be enabled. All other classes are slightly optional, but I would still recommend it over all the other perks in category 2.
Most Effective On: Everyone.
Sonic Boom – The sonic boom perk gives your explosive damage an added boost of power and range. There really isn’t much to say, except have fun with it. This perk is great for large servers where a single grenade can get a few kills every time.
Most Effective On: Combat classes with frag x3 perk on.
Overkill – An excellent choice when “perking out;†it offers you the ability to take two full weapons into battle rather than a pistol. This is great for players that enjoy a Rambo style game where you like more bullets than kills or for players that like having a long and close range weapon on hand. I myself, rarely use this perk because most servers always have weapons lying around anyways. Might as well take advantage of a perk I can’t use once on the field.
Most Effective On: Combat classes that want long and short range weapons.
Double Tap – If for some reason you want to increase the already fast rate of fire your guns deal out, pick this perk. It will pump even more rounds out and is great for pray and spray tactics (lol). The most sensible choice would be to put this on a slow firing weapon like the M14 or G3, but I don’t really see this perk as too useful.
Most Effective On: SMG’s and LMG’s that need to pump more rounds down field (suppressive fire).
Perk Category 3
Extreme Conditioning – If you are playing a mode where you need a “scout†like team mate to run up and capture points, the extreme conditioning perk could be rather strategic. Otherwise I would leave it off.
Most Effective On: Fully-automatic, fast firing classes (SMG’s, M4) that need to suppress enemy attacks while holding capture points.
Steady Aim – This perk is an excellent choice for SMG’s. It allows you to run around like crazy and have some decent aim while firing at the hip. I recommend it for any team member wanting that faster combat or needing some help aiming on the run.
Most Effective On: SMG’s and fast firing weapons that can be fired from the hip (M4).
Last Stand – Last Stand is an interesting choice because it requires the most skill out of this entire category. It allows you to “cheat†death and have one last shot at taking down any enemies you can see. What’s nice about it is that if you get good at picking off targets quickly, you can get more than 1 kill. I’ve been in a few situations where I was in last stand mode and got 3 or 4 kills without much effort. The problem with this perk is that most people (except n00bs), look for it now and the good ones can pick you off well before you have a chance to fire the gun. However, you should definitely give it a try and see what you think.
Most Effective On: Combat classes that have the opportunity to be surrounded by enemies they can pick off.
Deep Impact – This simply unlocks the ability to shoot weaker weapons through items they would normally have difficulty with. I have barely ever used this because the other perks are far more beneficial.
Most Effective On: Weak weapons that can’t shoot through certain material (Pistols, M16).
Dead Silence – Silent movement sums up this perk completely. No longer do your feet make noise when you walk around. Even when your running it is barely audible. I highly recommend this perk because it is just another level of stealth protection. A bunch of my custom classes have this along side UAV Jammer and it has summed up to a smattering of free kills. This perk is especially effective in smaller servers where players actually take time to listen for footsteps.
Most Effective On: Any class that relies on stealth protection or any class in general when playing on small servers.
Iron Lungs – This is a sniper only perk that allows players to hold their breath for a much longer time. This is almost required for people wanting to become better snipers because it allows you a longer window to get those perfect shots.
Most Effective On: Snipers.
Eavesdrop – I am not going to review this perk because I have never used it.
Most Effective On: Unknown.
Martyrdom – This is like a freebie attempt at getting a kill every time you die. It automatically drops a frag grenade at your body in an attempt to blow up whoever shot you. Now this perk can be nice because it gets you some free kills occasionally, but it’s also pretty n00b because it doesn’t require any skill. Fortunately for the rest of us, people have become so accustomed to this perk that it is becoming less useable (except on high population servers). I recommend it when you are first starting out the game.
Most Effective On: Combat classes that have the opportunity to be surrounded by enemies they can hit.
Class Loadouts
Here are some sample classes I’ve found to be very effective.
- M4 Carbine with silencer, M9 pistol without silencer, frag x3, UAV Jammer, Dead Silence
- M16A4 with ACOG Scope, Any pistol with silencer, frag x3, UAV Jammer, Dead Silence
- M21 Sniper, Desert Eagle, claymores, UAV Jammer, Iron Lungs
- M249 S.A.W. with Grip, Any pistol without silencer, bandolier, sleight of hand, steady aim
- G3 with silencer, any pistol with/without silencer, claymores, UAV Jammer, Dead Silence
- M40 Sniper, Desert Eagle, claymores, UAV Jammer, Iron Lungs
- P90 with silencer, Desert Eagle, special x3, UAV Jammer, steady aim
- MP5 with silencer/red dot, Desert Eagle, special x3, UAV Jammer, dead silence/steady aim
Hopefully now you understand all the weapons, attachments and perks and have created some custom classes you want to try out. It may take awhile before you’re comfortable with all the guns, but it’s important you keep trying. All my recommendations are things that helped me raise my K/D ratio and learn the game better. Hopefully it affects your game as profoundly as mine, but remember that these are merely suggestions and may fail to work with your style of play. However, stay tuned for the future level guide, in which I will be breaking down the maps and showing some useful hints and tricks.
Source Information:
- http://www.callofduty4.biz/?page_id=8
- http://www.sharkyforums.com/showthread.php?t=306595
- Personal In-game testing
Some fun information regarding the weapons: http://boardsus.playstation.com/playstation/board/message?board.id=callofduty3&thread.id=104743